
HTML templates are pre-made page layouts that can be enhanced with individual page elements to create visually appealing, responsive, and interactive custom course materials without having to write any HTML code. Adding HTML Templates to course content can be done by selecting the desired sample page layout and then adding dynamic or static page elements into the course content as needed using the HTML Editor.
Getting Started with HTML Templates
To get started with HTML templates in D2L Brightspace, follow these steps:
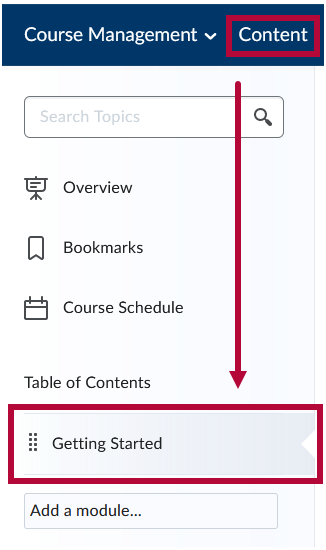
- On the Navbar, click [Content], then click on the module or sub-module where you want to add an HTML template.
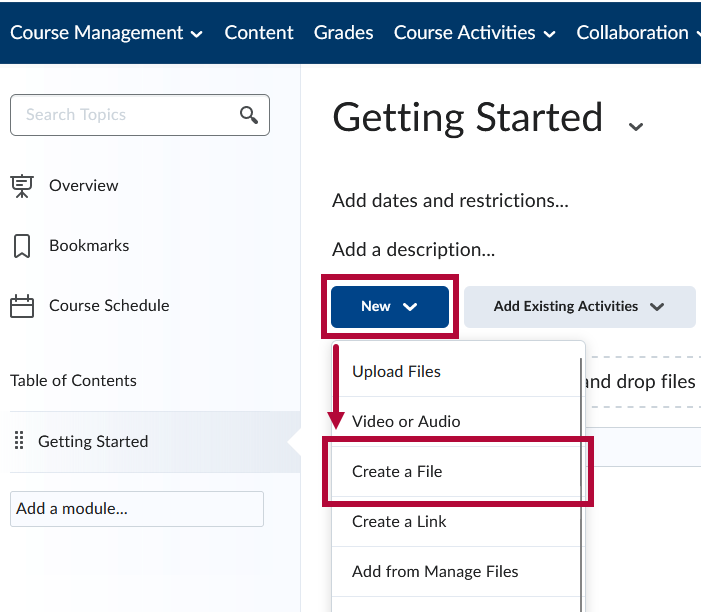
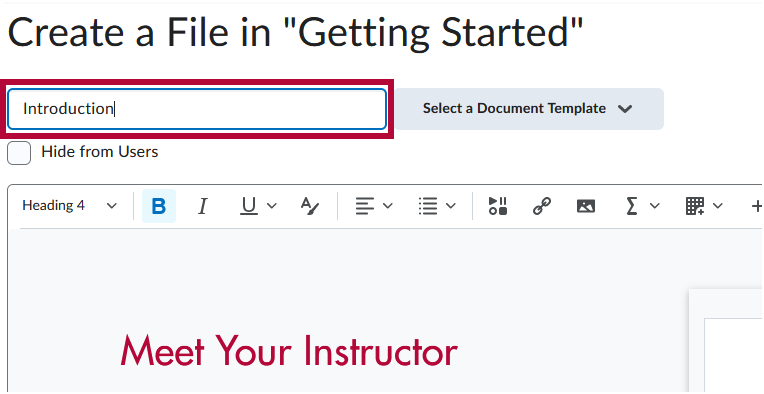
Click on the [New] button and select [Create a File].
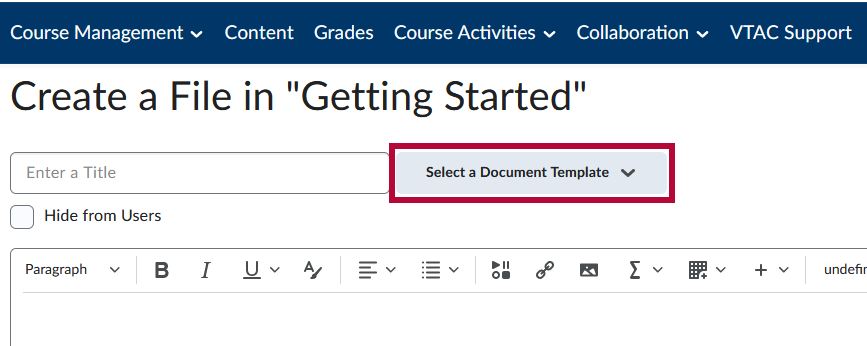
Click [Select a Document Template].
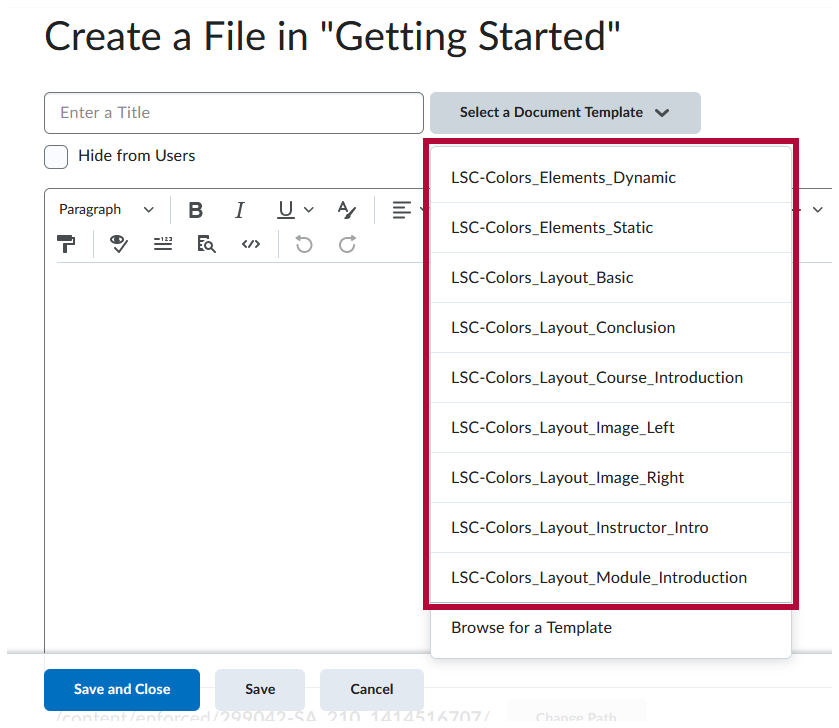
Choose the HTML template that you want to use from the list of available templates.
NOTE: If you do not see the Templates listed here, refer to the Browse for a Template section below for alternate navigation.
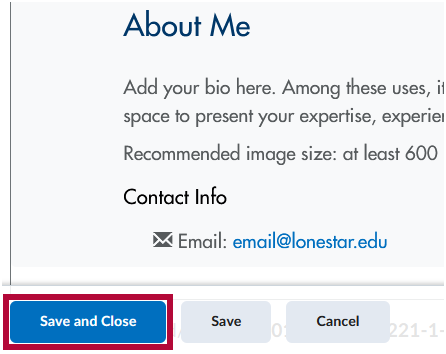
Customize the template as needed by adding your own text, images, and other content.

Give your file a [Title].
When you're done editing the template, click on the [Save and Close] button to save your changes.


Activating HTML Templates in a Course
In some older courses, community groups, and sandboxes, it may be necessary to manually activate HTML Templates before you can follow the steps above. To add HTML Templates to a course manually:
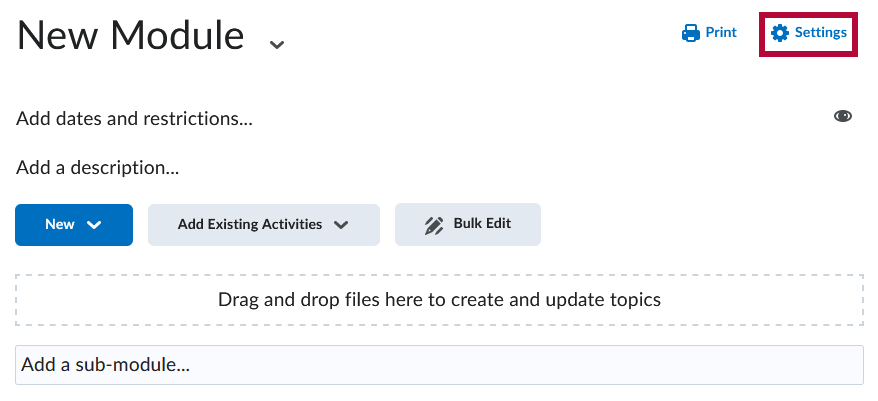
- On the Navbar, click [Content], then click on any module or sub-module.
- Click [Settings] in the top right.
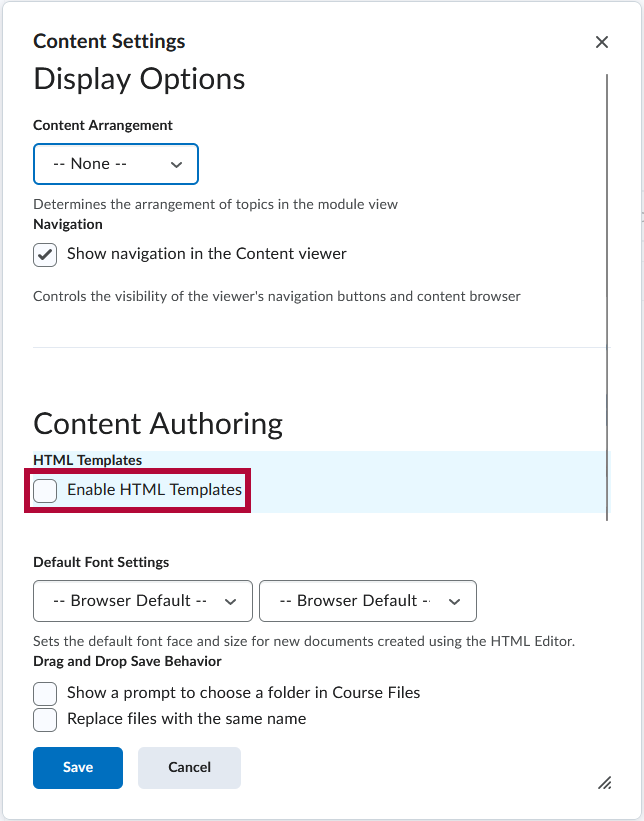
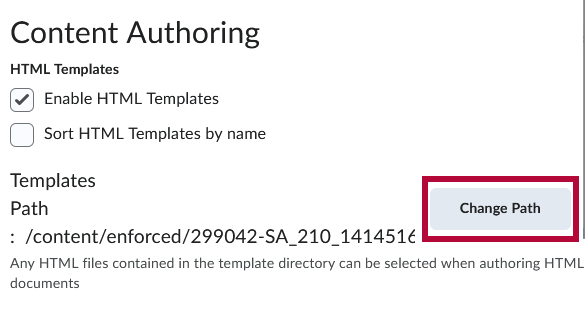
- On the Content Settings window, click the checkbox for [Enable HTML Templates].
- Click [Change Path].
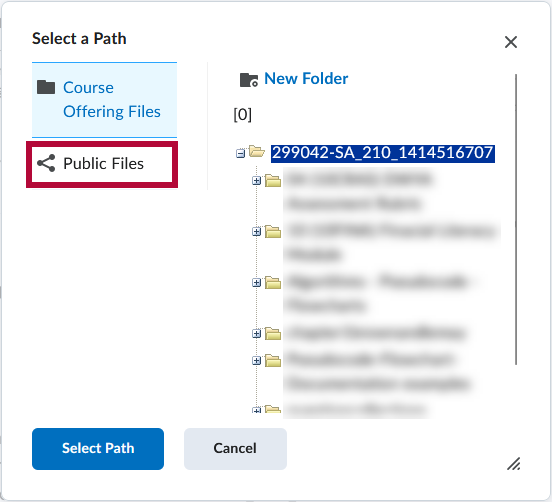
- On the Select a Path window, click [Public Files].
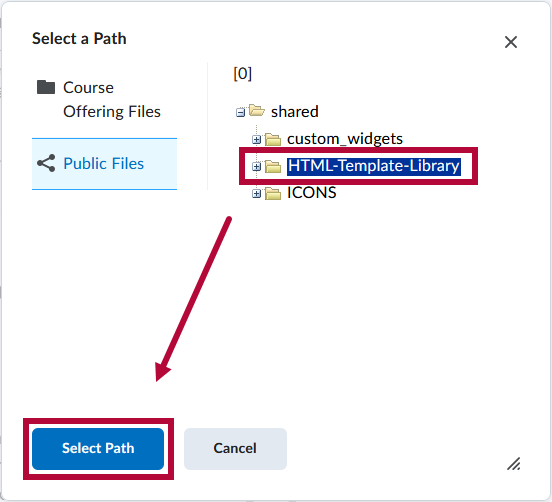
- Select [HTML-Template-Library]. Then click [Select Path].
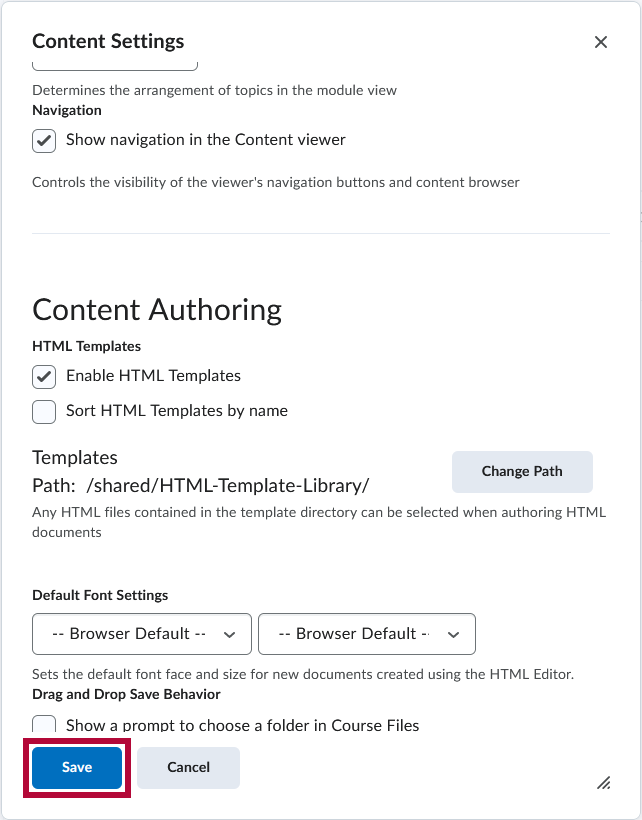
- Back under Content Settings, click [Save].


Tips for using HTML Templates
Make sure to choose a template that matches the content you want to create. See our HTML Template Catalog to see the Templates available.
Don't be afraid to customize the template to fit your needs. Add your own text, images, and other content as needed to make the template work for you.
Be sure to preview your content before publishing it to your students. This will help you catch any errors or formatting issues before your students see the content.
- These templates are currently not recommended for learning material that is intended for printing and saving outside of the learning environment.
- To create a course back-up or to keep a copy of the course for your own records, it is recommended to store the edited HTML template content at the course level, and use the [Import/Export/Copy Components] Export the course package, and include course files in the export package, as well as All Items under Course Appearance.
- We recommend adding images into a template page using the [Insert Image] or [Insert Stuff] buttons in the HTML Editor. This makes it easier to add your Alternative Text. If you paste an image inside of the template, you will not be prompted to add the alt text until you run the accessibility checker.
NOTE: For more assistance with customizing Course Content Design using HTML templates, please contact an Instructional Designer.